Pinned Post


Please click HERE to join in "Ellibelle's Crafty Wednesday" challenge.


Please click HERE to join in "I Spy With My Little Eye" challenge.


Apr 27, 2019

Allsorts Challenge 517: Mother's Day or Feminine

Hello and welcome! Sorry I haven't posted in almost 10 days. I did make a few cards during this time, but I was working ahead on some posts and had nothing I could share yet.

But today a new theme started at Allsorts challenge and we're back to our regular -weekly - schedule. Mervi is hosting this week and she picked the theme of "Mother's Day or Feminine". Hope you can join us for a chance to win some Woodware stamps.


I so love the style of stamps from the Penny Black set Butterfly Garden! It's a new to me set, and I think it is also from a more recent release from a couple of months ago.


Related Products:


I heat embossed the butterfly using white detail Embossing Powder on Bristol Vellum paper. Then watercolored it with my Zig Clean Color markers. It's been carefully fussy cut with Cutterbee scissors to add to the design. The background was done with a dotted stencils, unfortunately I don't rememer who it's by, but I think any stencil would look nice behind the butterfly. I used Tumbled Glass Distress Oxide ink for stencilling, last time I used this stencil with yellow ink and didn't wash it off (please tell me I'm not the only one who doesn't wash the ink off their stencils!!) so the two colors mixed gave this pretty shade of light green. The paper strips are from my stash and the Mother's Day sentiment on the card front is an older one from a Whimsy Stamps set and no longer available.


I continued with the stencilling on the inside as well and used another stamp from this set along with a sentiment from the Penny Black set Friendship. I thought this sentiment was perfect for the occasion.


I'm sharing with these challenges:
CAS on Friday - Butterflies // Penny Black Saturday Challenge - Penny Black Stamps // Alphabet Challenge - CAS // Colour Crazy Challenge - Coloring // Paper Shelter Challenge   - Add a Sentiment
Anything Goes:

Many thanks for visiting! Hope you have a wonderful weekend! Rain in our forecast, but it could be worse (supposed to snow just north of us - hope it stays there!). 


This post contains some affiliate links, meaning I may earn a small commission if you purchase something through the links, at no additional cost to you. Thanks for your support!


Apr 18, 2019

More Springtime for Penny Black and More Challenge Reminder

I am back today with a couple of Springtime/ Easter cards for the current theme at Penny Black and More challenge. Still plenty of time to join us if you haven't already or maybe you'd like to play along again - remember you can play along up to 3 times - for more chances to win. Our theme is simply "Springtime" so if it has a spring feel to it you can share it, just be sure to follow our simple rules which you can read about on the challenge blog.


  It's no secret that I love the Penny Black bunnies (and their animal stamps in general) and although these particular ones are wood mounted and have been retired some years ago, I reach for them every year for spring themed cards.


Both were stamped with Versafine Clair Nocturne ink and watercolored with my Zig Clean Color markers and a Zig Detailer waterbrush. I used Winsor and Newton watercolor paper. 

Here I used the stamps "Bunny Kiss" and "Happy" (sentiment). The butterfly die is part of Penny Black's Flowing Butterfly die. I die cut it with white card stock, trimmed off the one I wanted to us and inked with Mustard Seed Distress ink with a little bit of Wild Honey ink on the edges of the butterfly. The paper strips are from my drawer of paper scraps. These particular ones are by stampin up but long retired. 


The image stamp I used on the second card is called "What a Spring". Another wood mounted one by Penny Black, unfortunately not so easy to find now but you might have some luck on ebay or etsy. Again stamped with Versafine Clair Nocturne ink and watercolored with  Zig Clean Color markers and Zig Detailer brush on Winsor & Newton watercolor paper. The sentiment I used here is from an old Easter stamp set by Stampin Up called "Gifts of Spring". I used the scallop circle die from Penny Black's die set Pinwheel that I received as a gift from our wonderful team leader Brenda a year or two ago. Paper strips are from my stash, and here you can see why I keep even the smalles pieces of papers! They worked here so perfectly especially the pink stripes matching the way I colored the tulips so well. And you can always use some polka dotted paper in black and white :) 
I embellished with a button and some May Arts Natural Jute Twine. Mounted onto Hero Arts Dove White 100lb card stock to comlete the card
Sharing here:
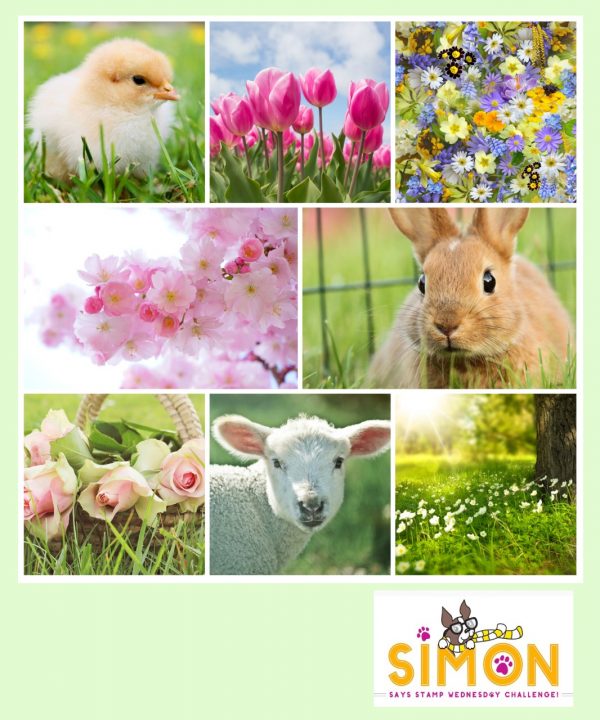
Simon Says Wednesday - Spring Mood Board
Stamploration - Stamps and Watercolors
Cardz 4 Galz - Pretty Papers // Moving along with the Times - That Spring Feeling // TIME OUT Challenges  // TIME OUT Challenges - Embellishments // Brown Sugar  - Spring or Fall // My Time to Craft - Easter // Penny Black Saturday Challenge - Spring Colors // The Fairy and the Unicorn - Easter Rabbits // Dare 2B Artzy Challenges - Animals // International Art & Soul - Easter //
Paper Minutes - Anything Goes


Thank you so much for visiting!! 
Wishing you a Happy Easter, hope it's filled with lots of sunshine!

Related Products:

Currently FREE SHIPPING (USA only) at $50 or more at Scrapbook.com. 
Use Coupon Code FREESHIP423. International costumers can use Coupon Code FIVEAPR423 to receive $5 off an order of $50 or more! Ends 4/18.


This post contains some affiliate links, meaning I may earn a small commission if you purchase something through the links, at no additional cost to you. Thanks for your support! 


Apr 17, 2019

Ellibelle's Crafty Wednesday - Midmonth Inspiration

Happy Wednesday and thank you so much for visiting! If you are here for Ellibelle's Crafty Wednesday challenge, then you are at the right place! Today I am sharing another card for the April theme which is


"Wings, Tails or Spring Blossoms"

Feel free to choose one, two or all three! The linky tool has been added at the end of this post again, but as always it is also still accessable on the original April challenge post.

Off topic, but did you hear Mo Manning's Design team brought back their blogging challenge? I personally don't care much for Facebook challenges so I entered there only once while it was held on Facebook.  I don't know about anyone else but I find blogging a much better platform for those types of things. So I am really excited that their challenges are back in blogland and thought I'd spread the word to those who haven't heard!

But now back to my card ... I decided to combine this post with Mo's Digital Pencil Challenge (among some others) so I used the image Teen Fairy Mia for my card.  She's been colored with my Faber Castell Polychromos pencils (my choice of coloring medium for digital images) on Neenah 80lb card stock. 


Related Products:

Currently FREE SHIPPING at $50 or more at Scrapbook.com. 
Use Coupon Code FREESHIP423. Ends 4/18. 


I decided that I wanted some stencilling behind the image, so I tore a post it note into small pieces and layered them over the image where needed as a mask. The stencilling is hard to see in the photos as I used a really pale pink ink (Spun Sugar Distress Ink) for the stencilled design. The stencil is by Penny Black - Hypnotic

You can see more of the stencilling in the photo below. But isn't this image GORGEOUS!! You might also notice that I added some sparkles to the wings and the flower using my clear Wink of Stella glitter brush. I embellished with a pink button from my stash and white cotton twine. 


I rounded the corners and layered the image over a pattern paper by 7 Gypsies. Unfortunately I am not sure which paper pack it's from.  The "Happy Birthday" sentiment is part of a set given away for free by Scrapbook.com - Handmade Essentials. The "From the Heart" is a metallic sticker by Tim Holtz' Quotations.

If you are in the United States then I hope you took advantage of this offer, but if not, you might still be able to get it - the coupon code still worked as I type this (4/16). You do have to pay for promotional shipping which is $2.24, but that wasn't a deal breaker for me. Also, this is not a cheap quality set like those you usually find in the Dollar Bins. This set is made in the USA of premium photopolymer and stamps beautifully. I love how it also includes stamps for the back of cards or as as letter seal.


If you are interested in this set, be sure to add coupon code FREE3762 this will take $10.00 off (the cost of the stamp) and then will show a shipping charge of $2.24 in the cart. Unfortunately this offer is only good within the United States. Here is what it looks like. 


Clear Photopolymer Stamp Set - Handmade Essentials


On another note, Scrapbook.com currently offers FREE SHIPPING at $50 or more for US shipping adresses with coupon code FREESHIP423. (International costumers can use coupon code FIVEAPR423 to receive $5.00 off an order $50 or more). But please note: you can only use one coupon code at a time, meaning, if you'd like to get the set above for free you will have to place a separate order because a promotional shipping charge does apply for that set, and once you enter the free shipping coupon code it will remove the other coupon code for the free set. A bit confusing, right? But I think most retailers usually allow just one coupon code at a time. Note: The Free Shipping Coupon expires on 4/18. 


Challenges I am playing along with: 
Mo's Digital Pencil Challenge Blog - Anything 'Mo'/ option of Spring // Unicorn Challenge - Spots or Stripes // Crafty Friends Challenge - Birthday // The Fairy and The Unicorn - Anyting Magical Goes // Colour Crazy Challenge - Coloring // Craft-Dee BowZ - Handmade Bow // Crafty Hazelnut's Patterned Paper  - Pattern Papers // Daisy Chain Challenges - Make it Feminine // Digi Doodle Studios Challenge Blog  - Hand Coloring 

Anything Goes (and I found lots of them!): 


As a reminder, the prize for my Crafty Wednesday challenge is this cute rubber stamp from my prize box:

To play along simply leave a link to your blog post with the linky tool below. Please remember to leave a link back to my blog in your blog post and the given themes must be followed in order to be entered into the prize drawing.

Please remember: this is a public blog, meaning any papercraft you link up or any comments left on this blog will be visible and clickable by third parties. The blog owner is not responsible for republished content from this blog on other blogs or websites without permission. 

This post contains some affiliate links, meaning I may earn a small commission if you purchase something through the links, at no additional cost to you. Thanks for your support! 


Apr 13, 2019

Allsorts Challenge 515 & 516: Bugs, Butterflies and Blossoms

Hello and welcome!
It's Saturday and that means it's time for a new theme at Allsorts challenge. This time our challenge runs for 2 weeks over the Easter holiday. This gives everyone a little extra time to join us! We have a new sponsor this time - The Paper Box - giving away a gift certificate to their shop. Hope you can join us!

We have fun theme for you, chosen by Brenda - Bugs, Butterflies and Blossoms. Choose one, two or combine all three.


All stamps I used on this card are from the Stampin Up set "Butterfly Basics". It's my newest stamp set from Stampin Up, but I placed my last order with them a few years ago so it is now retired as well, but like with most retired Stampin Up products it can be found on ebay.

Related Products:


I created a "smooched" background by using Distress Oxide inks Wilted VioletTumbled Glass and Bundled Sage. Next I stamped the flower and butterflies with Versafine Clair Nocturne ink. The grid lines on my Stamp Platform came in handy to line up the butterflies almost perfectly. The sentiment was stamped with Bundled Sage ink 3 times across the card and I stamped the lace-y butterfly from this set with Tumbled Glass ink. To add a little more interest I used the "honeycomb" stamp (which is also from the set) randomly on the background with Wilted Violet ink. Distressed the edges and framed with colored card stock, then mounted onto a white card base.


Stampin Up Butterfly Basics - Retired but should be available on Ebay or Etsy


I'm sharing my card with these challenges:
Simon Says Wednesday - no Designer Paper // Pattie's Creations - Flowers // DL ART Thankful Thursday Challenge - Spring // Crafty Sentiment Designs  - For Girls // Path of Positivity  - Something Positive // Use Your Stuff - Flora and Fauna // Daisy Chain Challenges - Feminine // Tales From The Craft Room - Spring or Easter

Anything Goes:


Thank you so much for visiting! 

This post contains some affiliate links, meaning I may earn a small commission if you purchase something through the links, at no additional cost to you. As always, thanks so much for your support!


Apr 12, 2019

Watercolor Garden // Flashback Friday

Happy Friday! I'm bringing you another card today with some "Oldie but Goodie" stamps, that haven't seen ink in maybe a decade?


I thought this stamp set would  be perfect for an Easter card with the beautiful 2-step stamping tulips. I incorporated some stencilling and background stamping and used Distress inks / Oxides for stamping. Some of you might recognize the main stamps from the Stampin Up set "Watercolor Garden 2". The butterfly stamp is from the Stampin Up set "Watercolor Garden 1". These are wood mounted stamps so it wasn't so easy lining up the 2nd step and I simply eyeballed and guessed, therefore the leaves are not lined up perfectly, but I think that just adds to the "handmade look" which sometimes gets lost nowadays with all the tools available now.  

I used Distress Ink Mowed Lawn for the stem and leaves (stamped off once for the lighter shade), and I used Wilted Violet Distress Oxide Ink, for the tulips, (also stamped off once for the lighter shade). I have no idea why the violet color is showing up more in a lilac tone on the photo... For the blue blossoms, butterflies and around the egde I used Tumbled Glass Distress Oxide ink. 


The tiny Happy Easter sentiment is from the Penny Black set "Chick to Chick" stamped in Versafine Clair Nocturne ink.  The stamped words that you can see in the background were done with a retired stamp set by Whimsy Stamps - I think it's called Basic Borders and Backgrounds - but it's no longer available, using Spun Sugar Distress ink.  If you look really closely, you migh even notice that I used a "canvas" background stamp. That's another old retired stamp from Stampin Up. The stripes were done with a  Classic Stripes Stencil

Watercolor Garden 1, Watercolor Garden 2 and Canvas by Stampin Up
(retired but I'm sure available on Ebay or Etsy)
Basic Backgrounds and Borders Whimsy Stamps


Related Products:


I am also sharing my card with these challenges:
Mod Squad Challenge - 3 items as focal point (3 stamped tulips) // Simon Says Wednesday - No Designer Paper // Cute Card Thursday - Easter // Moving along with the Times - Spring Feeling // Through the Purple Haze - Spring Forward // Brown Sugar - Spring or Fall // Pattie's Creations - Flowers  // Crafting By Designs - Easter // Unicorn Challenge - Spots or Stripes // Crafty Sentiment Designs - Feminine // Always Fun Challenges - Flowers // Use Your Stuff - Flora and Fauna // Country View Crafts' Challenge - Easter or Spring // Daisy Chain Challenges - Feminine // Fabrika Fantasy - Flowers // Lost Coast Designs  - Blooming Lovely // Try it on Tuesday - Use a Stencil or two

Anything Goes:


Thank you so much for stopping by! I hope I could inpire some of you to look through your old - maybe forgotten stamps and create something pretty! I will be back again tomorrow with another card using another stamp set from Stampin Up, but not quite as old as today's stamps. Hope to see you then!


This post contains some affiliate links, meaning I may earn a small commission if you purchase something through the links, at no additional cost to you. As always, thanks so much for your support!


Apr 9, 2019

Something Yummy!

Please click here if you are visiting for Ellibelle's Crafty Wednesday challenge!


Hello and welcome! I don't have a card to share today, instead I decided to share what I baked on Saturday (don't worry I am not turning my blog into a food blog, I will have a card to share again soon:-)


This past weekend I decided to treat my family to a Black Forest Cake. This is a longer blog post and you might think this cake takes forever to make, but it actually doesn't take that long, I just explained it step by step. I don't have the best pictures as I don't usually take pictures of food, but I tried my best. I am also no expert in cake decorating, so please don't expect a professional looking cake 😀. But I can assure you, it's delicious if you love chocolate-y things!


So lets get started. By the way, this is an old German recipe, so all measurements are in grams/ ml. But you can easily convert them to ounces with an online calculator. I personally prefer the metric system when baking because it's more accurate. I've had my digital kitchen scale for a long time and I can use it with the metric system and English measurement (which is more common here in the United States). 

Ingredients:

For the Sponge Cake

  • 6 eggs (at room temperature)
  • 250 g Sugar
  • 90 ml  Hot Water
  • 200 g Flour 
  • 75 g  Potato- or Corn Starch 
  • 50 g Cocoa Powder (unsweetened)
  • 2 tsp Baking Powder

For the Filling
  • 1 jar of Morello Cherries/Sour Cherries (I found mine at Aldi - save approx. 12 to 15 cherries for decoration or use fresh cherries for this)
  • 25 g Starch (to be mixed with cherries)
  • approx. 1000 ml Heavy Whipping Cream (32 oz)
  • 1 tsp Starch or 1 packet of Whip It (to be added to whipping cream - optional)
  • 1 Tablespoon of Powdered Sugar 
  • 6 Tablespoons of Cherry Liquor (you may substitute with Brandy or Rum. or make it alcohol free by using 6 Tablespoons of Cherry Juice)

Frosting/Decoration
  • 3 to 4 Tablespoons of Whipped cream (saved from the filling)
  • Chocolate shavings and saved cherries

I tried my best at writing up/translating the "how to" but if it sounds a little bit confusing it's because English is not my native language. But I hope it is easy for you to understand. If not, just leave me a comment.

Directions for the Batter / Sponge Cake:
  1. Preheat the oven to 395 degrees Fahrenheit (200 degrees Celsius) and line the bottom of a  spring form (mine measures approx. 9 3/4 inches or 25cm) with parchment paper.
  2. Separate eggs. In a large mixing bowl, mix the eggs, warm water, and sugar. Mix until sugar is dissolved and the mixture will be very creamy and pale yellow. (I used my Kitchen Aid Stand Mixer for this, but you can use a Hand Mixer as well.)
  3. In a separate bowl add the flour, baking powder, starch, and cocoa powder, blend together, then add to the egg and sugar mixture with a sifter or fine mesh strainer (what I am using). (I recommend replacing the wire whisk with the flat beater for this step if you are using a stand mixer.)
  4. Beat egg whites in a separate bowl with hand mixer until stiff, then fold into the rest of the batter. 
  5. Add batter to the spring form and bake for 25 - 35 minutes in preheated oven. It is recommended to lower the temperature during baking, so that at the end of baking time it will be at about 305 degrees Fahrenheit (150 degrees Celsius). This will prevent the sponge cake from sinking. (Unfortunately I overlooked this step when I baked my cake, so it did sink a little.) Ovens vary, so be sure to test with a skewer or toothpick. If it comes out clean, the cake is done. 
  6. When done, let cool for just a minute, then remove spring form and turn cake upside down on a cooling rack covered with parchment paper. Let cake cool completely before cutting and adding the cake filling. During this time you can prepare the whipped cream and cherry mixture. 

Birthday in a Box


Now it's time to cut the cake horizontally twice. Be sure the cake  has completely cooled before you do this step! You can purchase a cake leveler/cutter for this part. I do not currently own one of these devices, but have this one on my wish list. For now I use a ruler, some toothpicks and floss to cut layer cakes. I am sure many of you are experts and know how to do this well, but in case you are a beginner, you can read about how I do it.

(You can see in the photo below what I am trying to describe. Also, in this case I turned the cake right side up again, sometimes I leave it upside down though. It's really just a preference I think, but you will want to work with a flat even top. You can also cut it flat and eat the parts you cut off :-) 


For this cake I measured approx. 1/2" from the bottom all around the cake, placing toothpicks all around to mark the 1/2 of an inch. I repeated this process measuring 1" from the bottom all around, again marking with toothpicks.  Using the toothpicks as a guide, place the floss around the cake (I actually had to cut a little bit into the cake because my floss kept falling down - cake was a little bit over baked), overlap the ends of  the floss and pull to each side. The floss will cut the cake. (If the cake is still too warm, this will not work well - ask me how I know 😀).
Repeat this process at 1 inch. Now you have 3 layers. Separate the layers.


Directions for the Filling:
  1. Drain the cherries, but save all the liquid
  2. Mix about 6-8 tablespoonful of the liquid with the 25 g of starch and bring the rest of the liquid to a boil at medium low temperature. 
  3. Stir the starch mixture into the liquid and also add half of the cherry liquor (or cherry juice) and bring to another quick boil while stirring). Promptly remove from heat to prevent burning of the mixture. 
  4. The cherries (minus the ones you kept for decoration) can now be added to this mixture.
(I am aware that you can also purchase cherry pie filling for this, but I always find those much too sweet and prefer making my own.)


Completing the Cake:
  1. Using a Stand Mixer or Handheld Mixer whisk together the cold whipping cream (in a chilled bowl) and 1 tablespoonful of powdered sugar. You can also add a packet of Whip It or 1 teaspoonful of corn starch as a stabilizer. Save 3 to 4 Tablespoons of this whipped cream in a Pastry Bag.
  2. Drizzle bottom layer of cake with some of the Cherry liquor (or brandy/ rum or cherry juice), then add half of the cherry mixture, then (when cherry mixture is completely cooled) add about 1/3rd of the whipped cream and cover with second cake layer.
  3. Drizzle second layer again with a little liquor or juice, add the other half of the cherry mixture and 1/3rd of the whipped cream, making sure the cherry mixture has completely cooled before adding the whipped cream. Top off with the last cake layer and using an Icing Spatula cover the top and sides with the rest of the whipped cream.
  4. Finally decorate the cake as you wish with the whipped cream from the pastry bag with an attachment. I created 12 slices of cake. 


As you can see I am nowhere near a pro when it comes to decorating, but luckily my family doesn't care, they just want the cake!


I made my own chocolate shavings by simply using a Mandolin Slicer and yummy dark chocolate, then sprinkled on the top of the cake and the sides.


Thank you so much for stopping by! I hope you found this recipe of interest!


Amazon shopping links are above. These are affiliate links, meaning I might earn a small commission if you purchase something through the links but at no additional cost to you. Thank you so much for your support.

Apr 7, 2019

Penny Black and More - April Challenge

Good morning and happy Sunday! The April theme has just gone live at the Penny Black and More challenge blog and hope you can join us this month. We have some fantastic prizes to give away by Penny Black, Woodware and Rare Earth, so please do join us for your chance to win! 

Our theme this month is an easy one - Springtime - just be sure to remember stamping must be the focal point of your creation (PB stickeroos are the only exeption).


The critters and the grass are all stamps by Penny Black The bunnies were stamped on watercolor paper using  Versafine Clair Nocturne and watercolored with  Zig Clean Color Markers with a  Zig Detailer Waterbrush. Fussy cut to add to the design. The bunny with bird image is a wood mounted stamp called Sweet Talk. This particular stamp is retired but Penny Black re-released it as part of a clear stamp set called Garden Friends. The bunny sitting in a flower pot is part of the stamp Bunny Friends, which is a large stamp featuring a row of bunnies in flower pots, but I masked the rest of them off and used only one.


The flower shed is a stamp and die from Hero Arts January Kit (kit particular kit has unfortunately sold out). It's also been stamped on watercolor paper, colored with Zig markers and then cut out using the matching die. I stamped/ colored the awning twice and then fussy cut it the second time. Some inking on the bottom portion for some dirt and I used Stampin Up's retired set "Itty Bitty Backgrounds" for some interest. The grass is from Penny Black older set Enjoy Life.  For the sentiment I used one  from the same Hero Arts kit (happy), and then I used "Hello" from My Favorite Things' Label Maker set, which is retired, but this set by Altenew is similar. Before adhering the image panel to the card base, I added two strips of pattern papers.


Penny Black Garden Friends // Penny Black Bunny Friends   // Penny Black Enjoy Life // Hero Arts January Stamp Kit (sold out) // MFT Label Maker - Retired/ Similar by Altenew // Versafine Clair Nocturne // Bundled Sage Distress Oxide //  Zig Clean Color Markers //  Zig Detailer Waterbrush 


Also sharing with these challenges:
Dare 2B Artzy Challenges - Animals // Simon Says Wednesday - Animal Antics // Sisterhood of Crafters - Celebrate Spring // As You Like It Challenge - Fav. Coloring Medium (Love my zig clean color for quick and easy watercolor looks) // Cute Card Thursday - Anything Goes // Alphabet Challenge - A for Animals // Brown Sugar - Spring or Fall // Pattie's Creations - Flowers // Inkspirational - Pop it up (I popped up the awning) // Penny Black Saturday Challenge - Anything Goes // Send a Smile for Kids - Anything for Kids // Addicted to Stamps - Spring 


Thanks so much for visiting. Hope you have a fabulous Sunday! 


This post contains some affiliate links, meaning I may earn a small commission if you purchase something through the links, at no additional cost to you. Thanks so much for your support!